SDL Studio is unquestionably one of the most popular CAT tools in the market. Unfortunately, though, being such an extensive, all-encompassing tool, it can often intimidate users, many of whom end up using it only to edit and translate files and to save their work in translation memories. This is a waste of potential (and money not-so-well spent). This is why we’ve assembled four of Studio’s most useful but lesser known features; if you haven’t heard of them before, go ahead and give them a try the next time you’re using the tool.
- Display filter

Found in the Editor view, under the Review tab, Display Filter allows you to filter segments according to a set of criteria (e.g. only unconfirmed, reviewed, locked or unlocked segments). Just click on All segments and select the option that best suits your purposes. Another useful function of the display filter is that it allows you to search for a certain word or phrase in the source or target and view only the segments containing that phrase. This way, you can make batch corrections of your translation choices in one go or verify you’ve used the same terminology in the entire text without having to use Find & Replace.
- QA Checker
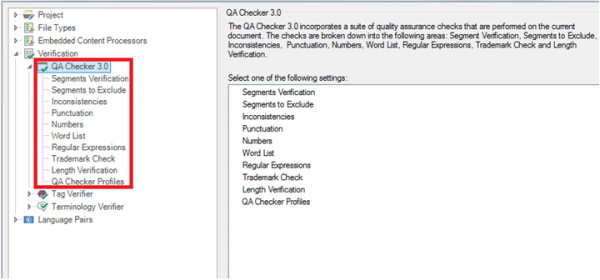
Any translator or writer who wants to be taken seriously is familiar with Spellchecker and the embarrassment it can save users by spotting typos and basic spelling mistakes. However, a feature less used by translators is Studio’s QA Checker, which in our opinion should be an indispensable companion to any translator using Studio. By clicking Project Settings->Verification, you can access the QA Checker menu and select the types of errors you would like Studio to spot for you (i.e. Inconsistencies, Numbers, Punctuation etc.). If you would like these settings to be the same for all your projects, access the same menu from File->Options. We especially recommend using it to verify numbers and punctuation!
- Update from reviewed target file
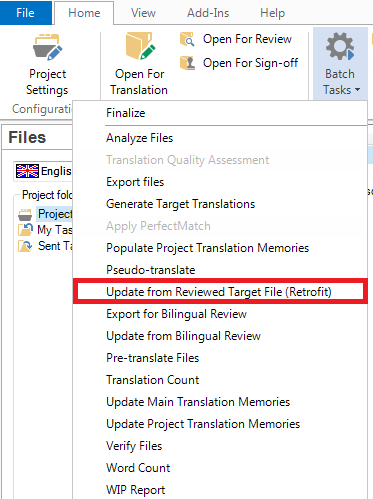
This is a particularly useful feature if you often have your translations reviewed by another colleague or if your client sends you a reviewed version of your translation in the target format. This way, you can import the changes in your translation memory and have the segments in their final form stored for future projects. Using it is very easy: In Files view, just select Batch tasks->Update from reviewed target file (Retrofit) and follow the steps of the pop-up menu.
- Autosuggest Dictionary
Autosuggest’s main role is to save you time from typing and to ensure consistent use of terminology. When you have an Autosuggest Dictionary activated in your project, by typing the first three letters of a word contained therein, you get a pop-up menu with suggestions and you can select the word you were going for. It works wonders when you have to translate texts with the same terminology or when the same words or phrases are repeated several times in your text. To do this, just go to Translation Memories view and select “Create Auto-suggest Dictionary” from the Home tab.
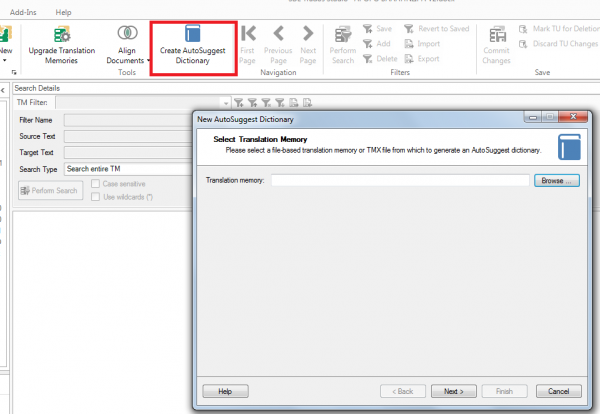
In the pop-up window that will appear, you can select the TM or .tmx file you wish to create your dictionary from. Just beware that you can only create a Dictionary from memories containing a minimum of 10,000 translation units.
To use the Dictionary you created in your projects, don’t forget to enable the use of Autosuggest through the File-> Options menu and to add your Autosuggest Dictionary in the Project settings->Language Pairs menu or in the same menu under File->Options if you wish to use it for all your projects.

* Autosuggest can also be used with Translation Memories, termbases and AutoText. You can use any combination of these resources for your own needs. However, do bear in mind that too many resources can create “noise” that will probably hinder rather than enhance your productivity!
And a tip:
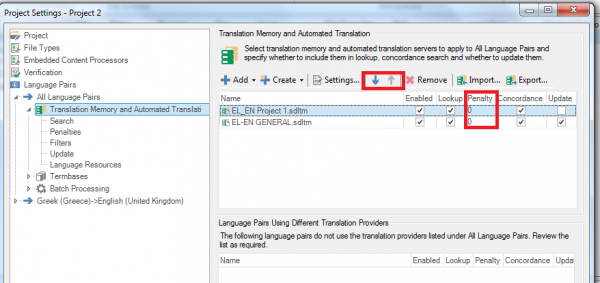
If you have more than one translation memories activated in a given project, you can select the order in which the results are displayed by using the two blue arrows right above their names in the Project settings->Translation Memory and Automated Translation view. You can also penalise results from a specific translation memory (ie give them a lower priority than other results) by inserting a number in the respective box under the Penalty column.